Installing Truline
General Steps to Install the Truline Wall System
Below are the general steps to installing a Truline anchored seawall in loose soil with a concrete cap. Other types of retaining wall installations using the Truline system are similar. These general steps do not replace a professional engineer’s specifications and drawing required per the project parameters. In addition, we always recommend that a soil report is completed before determining length of parts and installation requirements.


1. Prep site and install a wood drive guide.
Prepare the job site for construction. Whether it is a new wall or in front of an old wall, install a wood drive guide to establish the front of the wall and proper elevation.


2. Drive U-Channel & radius parts into the ground.
Attach Male End Cap to the first U-Channel part and drive into the ground, aligning vertically and horizontally. Continue adding and aligning parts. On the last U-Channel, drive a Female End Cap onto the end to finish.


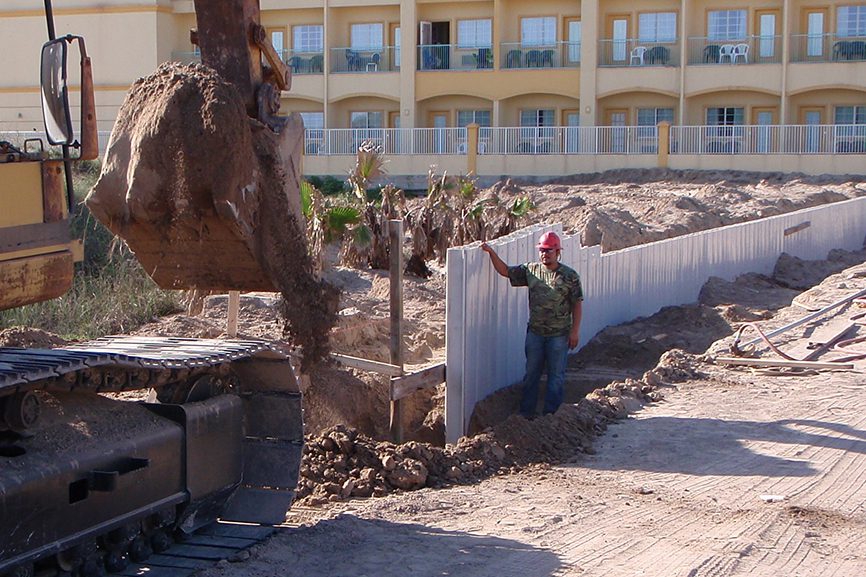
3. Remove the soil plug and install rebar.
Flood (jet pipe) the U-Channels and pump the soil plug out to the designed depth. Install vertical steel rebar in each U-Channel form, as per design.


4. Install weep holes, as per design.
Install weep holes, usually every 5-10 feet, along the face of the wall. See weep hole options.


5. Fill each U-Channel form with concrete.
Properly fill the U-Channel forms via the tremie pour method - do not free fall concrete. A video is available to show proper method. Next, create a form for the seawall cap, as per design, for the entire length of wall.


6. Install anchors.
Dig deadman and install tie rod anchors. Other anchor options can be done. Pour seawall cap and the deadman with concrete.
Picking Up the Truline Parts
All of the Truline U-Channel parts come from the factory with a 3" hole at the top of each side, as shown in the photo. This allows contractors to easily pick up the parts for installation using their equipment. For shorter length parts, Truline can be picked up by hand and slid into place. The Truline U-Channel part (the largest), weighs 7.1 pounds per foot.


Methods Used for Seawall or Bulkhead Wall Construction
There are a variety techniques and methods to install the Truline retaining wall system with standard installation equipment. The type of equipment used depends on the type of soil and the length of the Truline sheet piling.
- Driving – This is the most frequently used method for installing sheet piling with granular soil. In this method the piling is pressed into the soil using vibratory hammers or plates. With hard soil and/or longer sheet piling, a steel guided mandrel can be used.
- Jetting – Jetting of air or water helps loosen, soften or remove the soil under the sheet piling. Jetting along with driving is very effective.
- Digging – Often when there are hard soils or rock, a trench can be dug first to set the sheet piling into.


Accessories
Weep holes, anchors, capping and more.
Equipment
Airlift, mandrel and Rhino® driving hammer
Videos
Installation videos on tremie pour and more